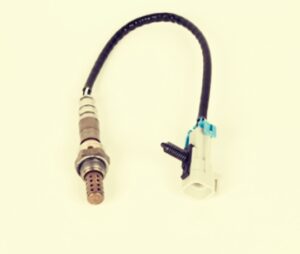
The oxygen sensor in your Mercedes-Benz is a critical component of the engine management system. It monitors the air-fuel ratio in the exhaust gases, helping the ECU (engine control unit) optimize combustion for better fuel efficiency, reduced emissions, and smoother performance. When an oxygen sensor fails, you might experience poor mileage, a rough idle, or even an illuminated check engine light.
If your oxygen sensor is faulty, replacing it is often the best solution. Here’s a detailed guide on how to locate, diagnose, and replace the oxygen sensor in a Mercedes-Benz.
What You’ll Need
- Replacement oxygen sensor (specific to your Mercedes-Benz model)
- Oxygen sensor socket or wrench
- Ratchet set
- Penetrating oil (e.g., WD-40)
- Safety gloves and goggles
- Diagnostic tool (scanner)
- Anti-seize compound (optional, often pre-applied on new sensors)
Common Locations of Oxygen Sensors in Mercedes-Benz
Mercedes-Benz vehicles typically have multiple oxygen sensors, located:
- Upstream (Pre-Catalytic Converter): Positioned before the catalytic converter to monitor the oxygen levels in the exhaust from the engine.
- Downstream (Post-Catalytic Converter): Located after the catalytic converter to monitor its efficiency.
For most models, you can find the sensors along the exhaust system under the vehicle. Access may vary based on the model and engine type.
Step-by-Step Guide to Fix or Replace an Oxygen Sensor
Step 1: Diagnose the Problem
- Check the Symptoms: Look for signs such as poor fuel economy, rough idling, or a check engine light.
- Use an Scanner: Plug the scanner into the diagnostic port to identify error codes. Common oxygen sensor-related codes include P0130 (Sensor 1 Bank 1) or P0136 (Sensor 2 Bank 1).
Step 2: Locate the Faulty Sensor
Use the error codes to determine which sensor is faulty:
- Bank 1: Refers to the side of the engine with cylinder 1.
- Bank 2: Refers to the opposite side of the engine.
- Sensor 1: The upstream sensor (before the catalytic converter).
- Sensor 2: The downstream sensor (after the catalytic converter).
Refer to your vehicle’s manual to pinpoint the exact location.
Step 3: Prepare for Replacement
- Ensure Safety: Park the car on a level surface, turn off the engine, and let it cool completely. Disconnect the negative battery terminal to avoid electrical issues.
- Lift the Vehicle: Use a jack and secure the car with jack stands if the sensor is located under the vehicle.
- Apply Penetrating Oil: Spray the base of the sensor with penetrating oil to loosen it, as it’s often exposed to heat and corrosion.
Step 4: Remove the Old Sensor
- Unplug the Sensor: Disconnect the electrical connector attached to the oxygen sensor.
- Unscrew the Sensor: Use an oxygen sensor socket or wrench to carefully unscrew the sensor counterclockwise. Be cautious not to damage surrounding components.
Step 5: Install the New Sensor
- Prepare the New Sensor: Check if the replacement sensor has anti-seize compound pre-applied. If not, apply a small amount to the sensor threads. Avoid the tip of the sensor.
- Install the Sensor: Screw the new sensor into place by hand, then tighten it with the sensor socket or wrench. Do not
- Reconnect the Wiring: Plug the electrical connector back into the new sensor. Ensure it clicks securely.
Step 6: Test the Repair
- Reconnect the Battery: Reattach the negative terminal.
- Clear Error Codes: Use the scanner to reset the check engine light and clear error codes.
- Run the Engine: Start the car and let it idle. Check for smooth operation and ensure the check engine light stays off.
When to Replace vs. Clean the Sensor
- Replace: If the sensor is damaged, corroded, or has failed completely.
- Clean: If the sensor is merely dirty or coated with soot, you can clean it with a sensor-safe cleaner. However, cleaning is often a temporary fix.
Why Fixing a Faulty Oxygen Sensor is Crucial
Driving with a bad oxygen sensor can lead to:
- Poor fuel economy and increased emissions.
- Damage to the catalytic converter.
- Reduced engine performance and potential long-term damage.
Prompt replacement keeps your Mercedes-Benz running efficiently and helps you avoid costly repairs down the line.
Need Professional Assistance? I’m Here to Help!
Replacing an oxygen sensor may seem straightforward, but diagnosing the root cause of the problem often requires expertise and professional diagnostic tools. If you’re unsure which sensor is faulty or you’re facing additional issues with your Mercedes-Benz, I can help!
As a Mercedes-Benz Electrician Technician, I specialize in diagnosing and repairing electrical and sensor-related problems for all Mercedes-Benz models. Whether it’s an oxygen sensor replacement or a deeper issue with your engine management system, I’ve got the tools and expertise to get the job done right.
Contact me today to schedule a professional service and ensure your Benz performs at its best!